Instalacja Apache, MySQL i PHP (LAMP) (Debian).
Niniejszy poradnik przedstawia proces instalacji tzw. LAMP czyli kompletu usług jakimi są Serwer WWW (Apache), bazy danych (MySQL) - tu MariaDB oraz języka PHP. Dzięki czemu możemy hostować dynamiczne strony internetowe czy popularne CMS takie jak WordPress czy PrestaShop.
Dystrybucja: Debian 10
- W pierwszej kolejności logujemy się do swojego VPS po SSH np. za pomocą puTTy, na domyślny port
22 - Następnie po zalogowaniu na konto
rootwydajemy polecenie aktualizacji listy pakietów poleceniem:
apt update
root@adamhitme:~# apt update
Hit:1 http://ftp.debian.org/debian buster InRelease
Hit:2 http://security.debian.org buster/updates InRelease
Hit:3 http://ftp.debian.org/debian buster-updates InRelease
Reading package lists... Done
Instalacja Apache.
Serwer WWW Apache instalujemy poleceniem:
apt install apache2 -y
root@adamhitme:~# apt install apache2
Reading package lists... Done
Building dependency tree
Reading state information... Done
The following additional packages will be installed:
  apache2-bin apache2-data apache2-utils
Suggested packages:
  apache2-suexec-pristine | apache2-suexec-custom
The following packages will be upgraded:
  apache2 apache2-bin apache2-data apache2-utils
4 upgraded, 0 newly installed, 0 to remove and 135 not upgraded.
Need to get 1961 kB of archives.
After this operation, 12.3 kB disk space will be freed.
Do you want to continue? [Y/n] y
Get:1 http://security.debian.org buster/updates/main amd64 apache2 amd64 2.4.38-3+deb10u5 [252 kB]
Get:2 http://security.debian.org buster/updates/main amd64 apache2-bin amd64 2.4.38-3+deb10u5 [1307 kB]
Get:3 http://security.debian.org buster/updates/main amd64 apache2-data all 2.4.38-3+deb10u5 [165 kB]
Get:4 http://security.debian.org buster/updates/main amd64 apache2-utils amd64 2.4.38-3+deb10u5 [237 kB]
Fetched 1961 kB in 1s (3009 kB/s)
(Reading database ... 28135 files and directories currently installed.)
Preparing to unpack .../apache2_2.4.38-3+deb10u5_amd64.deb ...
Unpacking apache2 (2.4.38-3+deb10u5) over (2.4.38-3) ...
Preparing to unpack .../apache2-bin_2.4.38-3+deb10u5_amd64.deb ...
Unpacking apache2-bin (2.4.38-3+deb10u5) over (2.4.38-3) ...
Preparing to unpack .../apache2-data_2.4.38-3+deb10u5_all.deb ...
Unpacking apache2-data (2.4.38-3+deb10u5) over (2.4.38-3) ...
Preparing to unpack .../apache2-utils_2.4.38-3+deb10u5_amd64.deb ...
Unpacking apache2-utils (2.4.38-3+deb10u5) over (2.4.38-3) ...
Setting up apache2-bin (2.4.38-3+deb10u5) ...
Setting up apache2-data (2.4.38-3+deb10u5) ...
Setting up apache2-utils (2.4.38-3+deb10u5) ...
Setting up apache2 (2.4.38-3+deb10u5) ...
insserv: warning: current start runlevel(s) (empty) of script `apache-htcacheclean' overrides LSB defaults (2 3 4 5).
insserv: warning: current stop runlevel(s) (0 1 2 3 4 5 6) of script `apache-htcacheclean' overrides LSB defaults (0 1 6).
Processing triggers for man-db (2.8.5-2) ...
Processing triggers for systemd (241-5) ...
root@adamhitme:~#
Apache jest zainstalowane.
Możemy sprawdzić status usługi poleceniem: systemctl status apache2
root@adamhitme:~# systemctl status apache2
● apache2.service - The Apache HTTP Server
   Loaded: loaded (/lib/systemd/system/apache2.service; enabled; vendor preset: enabled)
   Active: active (running) since Fri 2021-07-23 07:14:44 CEST; 2min 24s ago
     Docs: https://httpd.apache.org/docs/2.4/
 Main PID: 6999 (apache2)
    Tasks: 28 (limit: 4915)
   Memory: 4.3M
   CGroup: /system.slice/apache2.service
           ├─6999 /usr/sbin/apache2 -k start
           └─7000 /usr/sbin/apache2 -k start

Jul 23 07:14:44 adamhitme.serwervps.pl systemd[1]: Starting The Apache HTTP Server...
Jul 23 07:14:44 adamhitme.serwervps.pl systemd[1]: Started The Apache HTTP Server.
Komendy sterujące usługą to:
systemctl start apache2 - Start serwera
systemctl restart apache2 - Restart serwera
systemctl stop apache2 - Zatrzymanie serwera
systemctl reload apache2 - Przeładowanie konfiguracji serwera
systemctl status apache2 - Status usługi
Jeśli teraz wpiszemy w przeglądarce adres IP naszego serwera http://<adres ip serwera> wyświetli nam się domyślna strona Apache:
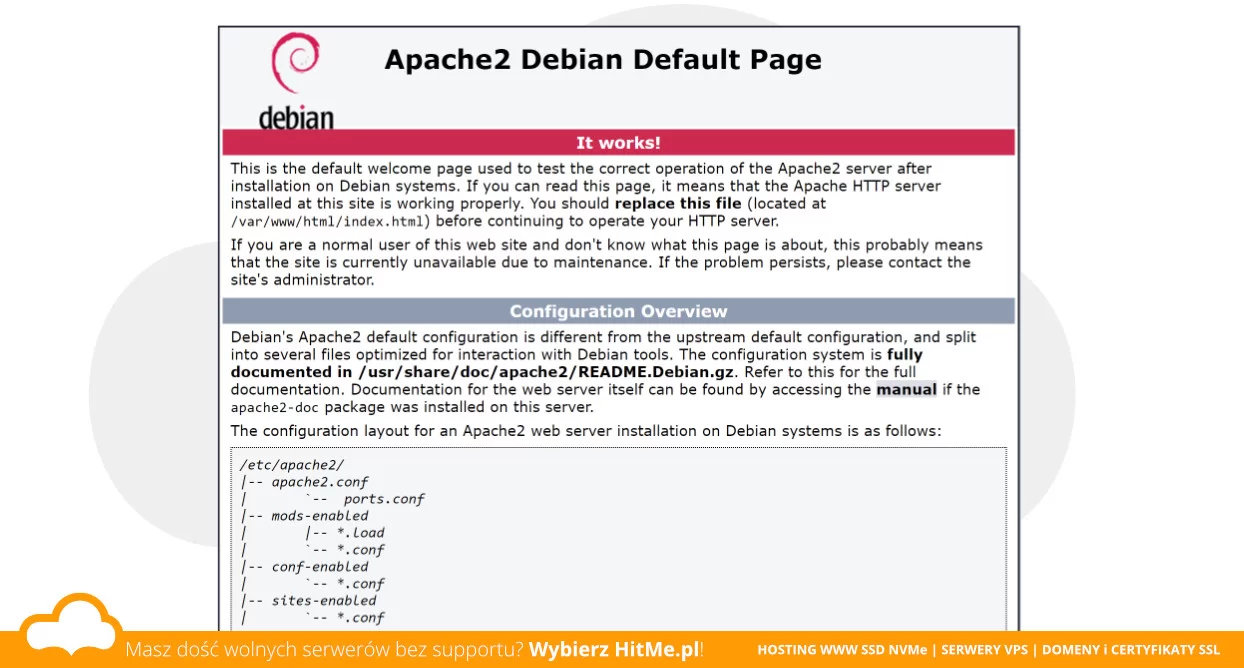 Debian. Apache - domyślna strona powitalna.
Domyślny katalog serwera WWW to /var/www i możemy tam umieścić naszą stronę.
Jeśli używamy jakiejkolwiek zapory (firewall) należy pamiętać o odblokowaniu portów TCP: 80, 443
Instalacja MySQL (MariaDB).
W celu instalacji serwera bazy danych wydajemy komendę:
apt install mariadb-server
Do you want to continue? [Y/n] Y W celu potwierdzenia instalacji wpisujemy Y + [enter]
Po zainstalowaniu sprawdzamy usługę: systemctl status mysqld
root@adamhitme:~# systemctl status mysqld
● mariadb.service - MariaDB 10.3.29 database server
   Loaded: loaded (/lib/systemd/system/mariadb.service; enabled; vendor preset: enabled)
   Active: active (running) since Fri 2021-07-23 07:37:17 CEST; 2min 3s ago
     Docs: man:mysqld(8)
           https://mariadb.com/kb/en/library/systemd/
 Main PID: 8047 (mysqld)
   Status: "Taking your SQL requests now..."
    Tasks: 31 (limit: 4915)
   Memory: 76.3M
   CGroup: /system.slice/mariadb.service
           └─8047 /usr/sbin/mysqld

Jul 23 07:37:17 adamhitme.serwervps.pl systemd[1]: Starting MariaDB 10.3.29 database server...
Jul 23 07:37:17 adamhitme.serwervps.pl mysqld[8047]: 2021-07-23  7:37:17 0 [Note] /usr/sbin/mysqld (mysqld 10.3.29-MariaDB-0+deb10u1) starti
Jul 23 07:37:17 adamhitme.serwervps.pl systemd[1]: Started MariaDB 10.3.29 database server.
Następnie przeprowadzamy wstępną konfigurację poleceniem: mysql_secure_installation
W tym procesie nadamy hasło dla głównego użytkownika bazy danych (root).
Na pierwsze pytanie o obecne hasło root - jeśli jest to nowa instalacja serwera - wtedy hasło jest puste.
Następnie na pytanie o ustawienie hasła root - zgadzamy się y oraz wymyślamy i wklejamy nowe hasło.
Na wszystkie pytania kreatora odpowiadamy y .
root@adamhitme:~# mysql_secure_installation

Enter current password for root (enter for none):
OK, successfully used password, moving on...
Set root password? [Y/n] y
New password:
Re-enter new password:
Password updated successfully!
Reloading privilege tables..
 ... Success!

Remove anonymous users? [Y/n] y
 ... Success!

Disallow root login remotely? [Y/n] y
 ... Success!

Remove test database and access to it? [Y/n] y
 - Dropping test database...
 ... Success!
 - Removing privileges on test database...
 ... Success!

Reload privilege tables now? [Y/n] y
 ... Success!

Cleaning up...

All done!  If you've completed all of the above steps, your MariaDB
installation should now be secure.

Thanks for using MariaDB!
root@adamhitme:~#
Gotowe.
Teraz możemy użyć komendy mysql -u root -p i wydawać polecenia SQL serwerowi.
root@adamhitme:/var/www/html# mysql -u root -p
Enter password:
Welcome to the MariaDB monitor.  Commands end with ; or \g.
Your MariaDB connection id is 57
Server version: 10.3.29-MariaDB-0+deb10u1 Debian 10

Copyright (c) 2000, 2018, Oracle, MariaDB Corporation Ab and others.

Type 'help;' or '\h' for help. Type '\c' to clear the current input statement.

MariaDB [(none)]> quit
Bye
root@adamhitme:/var/www/html#
Instalacja PHP.
Apache domyślnie nie obsługuję języka PHP tylko strony statyczne (.html/.shtml). Aby móc zainstalować popularne CMS musimy zainstalować PHP. Wybór wersji PHP zależy od administratora. Zainstalujemy wersję domyślną 7.3.
PHP wystarczy zainstalować poleceniem:
apt install php libapache2-mod-php -y
Następnie we wspomnianym domyślnym katalogu stron Apache, tj. /var/www/html/ tworzymy plik info.php z funkcją phpinfo();
Wydajemy polecenie:
nano /var/www/html/info.php
i w edytorze wklejamy poniższy kod i zapisujemy zmiany w pliku:
<?php
phpinfo();
?>
Następnie odwiedzamy w przeglądarce http://<ip serwera>/info.php
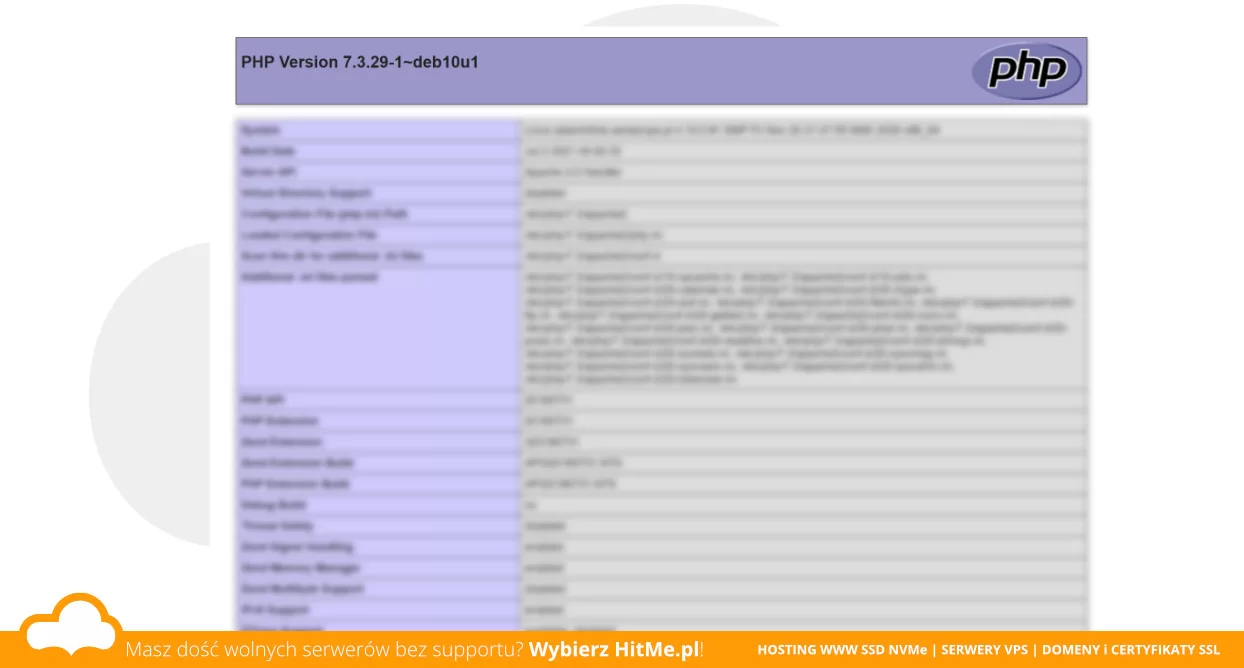 Funkcja phpinfo(). Potwierdzenie wersji i działania serwera PHP.
Gotowe. Mamy zainstalowany LAMP.